
Labels allow you to create a layer of text and markings over top of an image.
Labels are only viewable when in the image enhancement view.
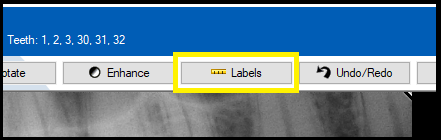
Begin by making your image full screen. You can do so by double clicking the image. Once in full screen mode, you should see 'Labels' at the top.
Undo/Redo are available for use with labels.
Interact with Labels
After creating a label, your mouse will likely still be ready to create more labels. Clicking this option changes your mouse back to a cursor that allows you to manipulate the labels you have placed down.
Double click any placed layer to see additional options.
- 'Freeze Label' will prevent the movement of that particular label.
- 'Dynamic Edges' will automatically adjust the layers edges to most closely fit the layer.
Pen
The Pen tool allows you to use your mouse and left click on the image to draw on the image.
Measure
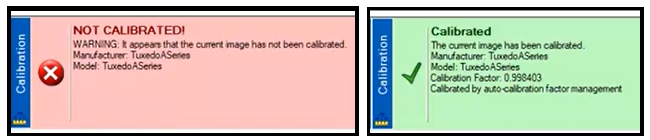
Only use this tool if your sensor is calibrated. See this article on calibrating sensor measurements to calibrate. You can check if the sensor that captured your image is calibrated by clicking the 'calibrations' tab at the bottom of the screen.
Single-click on the left mouse button; move the cross-hair to the end-point of the object; and then double-click on the left mouse button.
Non-linear calibrations can be created by left-clicking on mid-points while moving the mouse from point to point. Double-click on the left mouse button at the final end-point.
Arrow
Click and hold to drag an arrow onto the image.
Ellipse
Click and hold to drag an ellipse of customizable size and curve onto the image.
Rectangle
Click and hold to drag a rectangle of customizable size and rectangularity onto the image.
Text
Click and drag on the image to create a text box. Type your text on the right. Adjustable fonts and color options are available.

Time and Date
Left click to place the default time and date stamp on the image. Double click the layer to adjust the options.
Advanced Labels
- Angle: Click once to begin placing the first ray. Click again to place the vertex. Click once more to finish placing the second ray. Double click to finalize. Fine tune by dragging the yellow boxes. The displayed angle will dynamically update.
- Bisecting line: Click once to begin placing the first line segment. Click again to place the vertex. Click once more to finish placing the second line segment. Double click to finalize. Fine tune by dragging the yellow boxes. The displayed angle will dynamically update.
- Four Point Bisection: Click four times to place a bisecting line relative to all 4 points.
- Relative Angles: Click on the first advanced label, then on the second advanced label to see a preview of the relative angle. Double click to finalize.
- Straight Line: Click and drag to draw a straight line.
- Implants: Click on the image to display a list of implants. Included labels are listed by manufacturer, family, and model. If the image is calibrated, the implant will dynamically size to the image. Click and drag the label to move it. Click and drag any corner of the label to adjust its angle.
Calibration Options
- Calibrate Image: See this article on calibrating sensor measurements.
- Calibration Factor Management: Displays and allows deletion of all currently configured calibrations.
- Remove Current Calibration Factor: If the sensor that captured the current image is calibrated, this button will delete that.
Remove Labels
Allows for the deletion of one or more labels on the currently viewed image
Hide Labels
Hides all labels temporarily on the currently viewed image.
Article Version 1.1 2022.04.22