
Note: The same x-ray can appear vastly different depending on the display being utilized, or the software used to render it.
An x-ray will not appear identical when viewed on a 55inch 4k TV versus a 24 inch 1080p computer monitor regardless of the software, and (specifically with XVWeb) some variability in image quality may stem from differences in browsers and/or hardware (such as graphics cards) being used.
When it comes to image quality with x-ray sensors, there are 2 major categories that are usually being referred to:
- Ad-Hoc Image Quality -The minor adjustments done to an image, or images, which corrects for some minor issue. This is used when most images appear of acceptable quality to correct outliers, or when equipment used has inherent variability and cannot produce a stable quality of any form and adjustments from image to image will vary.
- Permanent Image Quality - Adjustment of settings which make or adjust permanent filters that can automatically apply to captured images (what are called Post Capture Filters) or be enabled/disabled via a toggle (what are called Real Time Filters).
The Ad-Hoc Image Quality Settings are available in different locations depending on the imaging software being used. Select the appropriate imaging software being used below to expand and display the steps for accessing the ad-hoc settings.
XVLite [LEGACY]
During layout capture, some basic image quality adjustments are available at the bottom of the capture window.
- With capture interrupted, click on the image that needs adjusted to highlight it and select the Image Operations button to bring up the available image quality adjustments:
-

From Clipboard - Pastes a copied image to the selected tile. -
Rotate - Spins the selected image one quarter turn clockwise. -
Flip Vertically - Mirrors the selected image so the top becomes the bottom and vice-versa. -
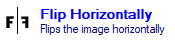
Flip Horizontally - Mirrors the selected image so the left becomes the right and vice versa. -
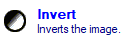
Invert - Adjusts the selected image so dark and light switch intensities (white and black negative becomes a black and white positive and vice versa)
-
While viewing an image or layout, there are a few more options available for ad-hoc image quality available:
- With a layout open, a similar menu to the one available during capture can be found on the left-hand side. Single-left-click an image to highlight it and select from the following:
-
Rotate 90 - Spins the selected image one quarter turn clockwise. -
Rotate 180 - Spins the selected image one half turn clockwise. -

Rotate 90 Counter-Clockwise - Spins the selected image one quarter turn counter-clockwise. -
Flip Vertically - Mirrors the selected image so the top becomes the bottom and vice-versa. -
Flip Horizontally - Mirrors the selected image so the left becomes the right and vice versa. -
Invert - Adjusts the selected image so dark and light switch intensities (white and black negative becomes a black and white positive and vice versa).
-
- If viewing a single image, or after double-clicking a single image within a layout, two new sets of options become available: the adjustment bar and the enhancement window.
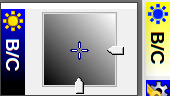
- The Adjustment Bar is actually available both in the main single image view and the Enhancement Window. It may be minimized but will appear as pictured:

The individual icons and there usage are listed below
-
 Mouse Controlled Zoom
(left-click zooms in, right click zooms out, middle-click zooms-to-fit, scroll wheel zooms in/out, and clicking-and-holding either button while moving the mouse up and down zooms in/out) -
 Zoom Out
 -
 Zoom-To-Fit
(makes entire image visible on screen) -
 Zoom In
 -
 Full-Screen /
  Exit Full-Screen
 -
 Brightness-Contrast
(clicking-and-dragging with the left mouse button up and down to adjust brightness and/or left and right to adjust contrast simultaneously) -
 Gamma Adjust
(clicking-and-dragging with the left mouse button left and right to adjust the gamma values of the image) -
 Spot Magnifier
(left-click to magnify, double-left-click to adjust magnifier size and strength, right-click to leave magnifier on screen) -
 Spot Contrast Enhancer
(left-click to enhance, double-left-click to adjust enhancement size, right-click to leave enhancer on screen)
-
- On the left-hand side of the single image view is the Enhancement option.
Clicking this will open the Enhancement Window which has the most ad-hoc image quality adjustments available:
-
(clicking-and-dragging with the left mouse button up and down to adjust brightness and/or left and right to adjust contrast simultaneously, or dragging the sliders on the bottom [contrast] and right [brightness] to make individual adjustments, while double-clicking with the left mouse button will re-center the cross-hair and reset the brightness/contrast adjustment)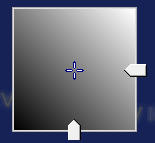
Brightness/Contrast Box - Used to quickly adjust brightness and contrast of the image. -
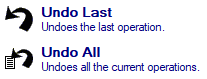
Undo Last / Undo All - Provide options for removing adjustments that have not already been saved to the image. -

Automatic Brightness/Contrast - Attempts to automatically set the brightness and contrast of the image to an acceptable quality. -
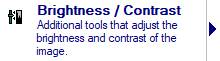
Brightness/Contrast - Menu containing the following options: - Brightness/Contrast - Adjust the brightness and contrast of the image.
(can be adjusted via sliders, numerical values, or via a B/C box similar to the first example under the Enhancement Window) - Equalize - Automatically equalizes the contrast of the image.
- Gamma Correction - Permits gamma correction of the image.
(can be adjusted via slider[s] or numerical value[s]) - Adjust Levels - Permits adjustment of the levels on the image.
(can be adjusted via histogram sliders or numerical values)
- Brightness/Contrast - Adjust the brightness and contrast of the image.
-
Rotate - Spins the selected image one quarter turn clockwise. -
Flip Vertically - Mirrors the selected image so the top becomes the bottom and vice-versa. -
Flip Horizontally - Mirrors the selected image so the left becomes the right and vice versa. -
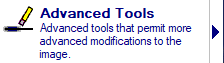
Advanced Tools - Menu containing the following options: - Sharpen - Permits custom sharpening of the image.
(sharpen factor = sharpen intensity, mask size = area affected by sharpen) - Smooth - Permits custom smoothing of the image.
(smoothing factor = smoothing intensity, mask size = area affected by smoothing) - Remove Noise - Performs noise removal of the image.
(mask size = area affected by noise removal) - Histogram - Displays the histogram for the current image.
- Sharpen - Permits custom sharpening of the image.
-
- The Adjustment Bar is actually available both in the main single image view and the Enhancement Window. It may be minimized but will appear as pictured:
XrayVision [LEGACY]
During layout capture, some basic image quality adjustments are available at the bottom of the capture window.
- With capture interrupted, click on the image that needs adjusted to highlight it and select one of the following:
 Rotate - Spins the selected image one quarter turn clockwise.
 Flip Horizontally - Mirrors the selected image so the left becomes the right and vice versa.
 Flip Vertically - Mirrors the selected image so the top becomes the bottom and vice-versa.
 Invert - Adjusts the selected image so dark and light switch intensities (white and black negative becomes a black and white positive and vice versa)
While viewing an image or layout, there are a few more options available for ad-hoc image quality available:
- There are 2 ways of accessing the image enhancement options: software menus, which contain all of the available enhancements, and quick-access toolbar/toolbox, which are highly customizable and fall back upon the software menus. We will start with the quick-access toolbar/toolbox:
- The Toolbar is the main series of icons at the top of the software. By default it does not come with many image quality settings (if any), but any of the menu items listed later can be added by following our guide on Customizing Toolbar Buttons.

-

The Toolbox is a set of easily accessible adjustments and options available on the right-hand side of the software. By default, this does come with a number of image quality related buttons (which are listed below, along with their affects), however this too is highly customizable. Each button can be completely changed by left-clicking the small black triangle in its lower right and following the same Customizing Toolbar Buttons guide from step 5 onward. -

Invert - Adjusts the selected image so dark and light switch intensities (white and black negative becomes a black and white positive and vice versa)
-

Flip Horizontally - Mirrors the selected image so the left becomes the right and vice versa.
-

Flip Vertically - Mirrors the selected image so the top becomes the bottom and vice-versa.
-

Rotate 90 Counter-Clockwise - Spins the selected image one quarter turn counter-clockwise. -

Rotate 90 - Spins the selected image one quarter turn clockwise. -

Fast Median - Automatic attempt at noise removal of the selected image. -

Gamma Correction - Permits gamma correction of the image.
(can be adjusted via slider[s] or numerical value[s]) -

Equalize - Automatically equalizes the contrast of the image.
-

Adaptive Normalize - Automatically normalizes the contrast of the image via an adaptive algorithm. -

Undo - Removes the last image enhancement applied. -

Spot Enhancer - Localized contrast enhancement.
(left-click to enhance, double-left-click or right-click to adjust enhancement size)
-

Spot Magnifier - Localized magnification lens.
(left-click to magnify, double-left-click or right-click to adjust magnifier size and strength)
- Enhancement > Brightness/Contrast > Brightness/Contrast)
-
- The menus at the top of XrayVision hold a plethora of image enhancements, and collected below are those settings, their usage, and their paths:


 Image Spot Inverter
Localized image inversion.
(left-click to invert, double-left-click or right-click to adjust inversion size) Image Box Magnifier
Opens a separate window for persistent magnification.
(left-click to position magnification, select magnification strength [1x-4x] within the separated window) Image Spot Magnifier
Localized magnification lens.
(left-click to magnify, double-left-click or right-click to adjust magnifier size and strength) Image Spot Enhancer
Localized contrast enhancement.
(left-click to enhance, double-left-click or right-click to adjust enhancement size) Image Spot Colorizer
Locally applies rainbow effect to grayscale image.
(near-black = red, near-white = blue, gray = yellow/green)Image Spot Real-Time Filter Locally applies selected Real-Time Filter.

 Invert
Adjusts the selected image so dark and light switch intensities (white and black negative becomes a black and white positive and vice versa).  Colorize
Applies rainbow effect to grayscale image.
(near-black = red, near-white = blue, gray = yellow/green) Colorized Display
Opens a separate window with multiple alternate colorize options. Flip Options for flipping an image vertically (top becomes the bottom and vice-versa) or horizontally (left becomes the right and vice versa). Rotate Options for rotating an image in 90 degree increments (spinning an image by quarter turns) as well as by a custom amount. Convert To Convert an image to monochrome (black and white), grayscale, 8-bit color, 24-bit color (RGB), or flipped RGB (BRG). Extract Color Create a duplicate grayscale image of the intensities of the selected color (red, green, blue, or all) within the original. Crop Remove unwanted/unneeded parts of an image.
(can be used in conjunction with the Actions > Image Selection tool)Resize/Reduce Change the resolution or the compression of the image.
(changing either may result in quality loss, which is why it was included in this list)
- Brightness/Contrast
 Brightness/Contrast
Adjust the brightness and contrast of the image.
(can be adjusted via sliders, numerical values, or via a B/C box much like near the Toolbox) Auto Brightness/ContrastAttempts to automatically set the brightness and contrast of the image to an acceptable quality. EqualizeAutomatically equalizes the contrast of the image. NormalizeAutomatically normalizes the contrast of the image. Adaptive NormalizeAutomatically normalizes the contrast of the image via an adaptive algorithm. Darken Dynamic RangeDarkens the dynamic range of the image.
(can be adjusted via a slider or numeric value) Lighten Dynamic RangeLightens the dynamic range of the image.
(can be adjusted via a slider or numeric value) Gamma CorrectionPermits gamma correction of the image.
(can be adjusted via slider[s] or numerical value[s]) Overwhite ScanAttempts to automatically set the brightness and contrast of an image containing a lot of white area. Adaptive Histogram EqualizationAdjust variables (sectors and clip) within the histogram equalization algorithm. - Adjust Levels
 Adjust Levels
Make changes to the grayscale histogram of the image.
(can be adjusted via histogram sliders or numerical values) Auto Adjust Levels (Median)Automatically adjusts the levels around the image's median value. Auto Adjust Levels (Average)Automatically adjusts the levels around the image's average value. -
 HSL Adjustment
Permits the adjustment of the hue, lightness, and saturation of a color image (non black-and-white or grayscale). -
 Make Proper Grayscale
Forces the image to conform to the standard definition of grayscale. - Sharpen And Edge Enhancement
 Sharpen
Permits custom sharpening of the image.
(sharpen factor = sharpen intensity, mask size = area affected by sharpen) Laplace Edge EnhanceEnhances the edges in an image.
(sharpen factor = sharpen intensity, mask size = area affected by sharpen) Gaussian Edge EnhanceEnhances the edges in an image.
(sharpen factor = sharpen intensity, mask size = area affected by sharpen) - Smoothing
 Smooth
Permits custom smoothing of the image.
(smoothing factor = smoothing intensity, mask size = area affected by smoothing)Gaussian BlurBlurs an image.
(mask size = area affected by smoothing) - Noise Removal
 Fast Median
Automatic attempt at noise removal of the selected image.
(centered around the median value, quick) MedianAutomatic attempt at noise removal of the selected image.
(centered around the median value) MinimumAutomatic attempt at noise removal of the selected image.
(centered around the minimum value) MaximumAutomatic attempt at noise removal of the selected image.
(centered around the maximum value) DespeckleAutomatic attempt at noise removal of the selected image.
(algorithmic attempt) -
Fourier Transform Allows various manipulations of the image via the fourier transform of the image. - Embossing
 Emboss
Emboss an image.
(select emboss scale and illumination direction/elevation) Emboss 3DEmboss an image in 3D.
(select illumination direction) Emboss StandardAutomatically embosses the image. -
Image Macros Create, store, and edit collections of enhancements to apply simultaneously. -
Imaging Algorithms Permanently apply the affects of a Real-Time Filter to an image.
(can be applied multiple times)
- Brightness/Contrast
- The Toolbar is the main series of icons at the top of the software. By default it does not come with many image quality settings (if any), but any of the menu items listed later can be added by following our guide on Customizing Toolbar Buttons.
XVCapture/DCV
During layout capture, some basic image quality adjustments are available at the side of the capture window.- With capture interrupted, click on the image that needs adjusted to highlight it and select the Image Operations button to bring up the available image quality adjustments:

-

Rotate 90 Clockwise - Spins the selected image one quarter turn clockwise. -

Flip Vertically - Mirrors the selected image so the top becomes the bottom and vice-versa. -
Flip Horizontally - Mirrors the selected image so the left becomes the right and vice versa. -
Invert - Adjusts the selected image so dark and light switch intensities (white and black negative becomes a black and white positive and vice versa). -

Advanced Image Display - Opens separate window with additional image enhancement options.
(similar to the image enhancement window discussed below, all items listed there available on this screen will be marked with a "*")
-
- When viewing an individual image or layout, either single left-click on an image to highlight it and select Image Enhancements from the left-hand menu,

or double left-click the image to open the Image Enhancements window.- The Adjustment Bar* is available in the lower right of the Image Enhancement window. It may be minimized but will appear as pictured:

The individual icons and there usage are listed below
-
Mouse Controlled Zoom
(left-click zooms in, right click zooms out, middle-click zooms-to-fit, scroll wheel zooms in/out, and clicking-and-holding either button while moving the mouse up and down zooms in/out) -
Zoom Out
-
Zoom-To-Fit
(makes entire image visible on screen) -
Zoom In
-
Full-Screen / Exit Full-Screen
-
Brightness-Contrast
(clicking-and-dragging with the left mouse button up and down to adjust brightness and/or left and right to adjust contrast simultaneously) -
Gamma Adjust
(clicking-and-dragging with the left mouse button left and right to adjust the gamma values of the image) -
Spot Magnifier
(left-click to magnify, double-left-click to adjust magnifier size and strength, right-click to leave magnifier on screen) -
Spot Contrast Enhancer
(left-click to enhance, double-left-click to adjust enhancement size, right-click to leave enhancer on screen) -
 Various Enhancements
(menu for various enhancements: invert, auto b/c, emboss, spot invert, or spot colorize [multiple spectrums])
-
- Across the top of this window will be the enhancement menus:

-
* 
Flip Vertically - Mirrors the selected image so the top becomes the bottom and vice-versa. -
* 
Flip Horizontally - Mirrors the selected image so the left becomes the right and vice versa.
-

-
* 
Rotate 90 Clockwise - Spins the selected image one quarter turn clockwise. -
* 
Rotate 180 Clockwise - Spins the selected image one half turn clockwise. -
* 
Rotate 90 Counter-Clockwise - Spins the selected image one quarter turn counter-clockwise. -
* 
Custom Rotation - Spins the selected image an amount specified in numeric degrees.
-
-
* 
Adjusts the selected image so dark and light switch intensities (white and black negative becomes a black and white positive and vice versa). -
* 
Attempts to automatically set the brightness and contrast of the image to an acceptable quality. -
* 
Automatically equalizes the contrast of the image. -
* 
Automatically normalizes the contrast of the image. -
* 
Automatic smoothing of the image. -
* 
Automatic sharpening of the image. -
* 
Automatic edge enhancement of the image. -
* 
Automatic attempt at noise removal of the selected image.
(quicker, but not as comprehensive as other options) -
* 
Automatic attempt at noise removal of the selected image.
(slower, but more comprehensive than the fast option) -
* 
Automatic attempt at noise removal of the selected image.
(designed for "speckled" noise removal) 
Brightness/Contrast Adjust the brightness and contrast of the image.
(can be adjusted via sliders, numerical values, or via a B/C box much like near the Toolbox)Gamma Correction Permits gamma correction of the image.
(can be adjusted via slider[s] or numerical value[s])Adjust Levels Make changes to the grayscale histogram of the image.
(can be adjusted via histogram sliders or numerical values)Gaussian Blur Blurs an image.
(mask size = area affected by smoothing)Smooth Permits custom smoothing of the image.
(smoothing factor = smoothing intensity, mask size = area affected by smoothing)Sharpen Permits custom sharpening of the image.
(sharpen factor = sharpen intensity, mask size = area affected by sharpen)Laplace Edge Enhance Enhances the edges in an image.
(sharpen factor = sharpen intensity, mask size = area affected by sharpen)Gaussian Edge Enhance Enhances the edges in an image.
(sharpen factor = sharpen intensity, mask size = area affected by sharpen)Noise Removal Automatic attempt at noise removal of the selected image.
(with mask size selection)Despeckle Automatic attempt at noise removal of the selected image.
(algorithmic attempt with mask size selection)-
* 
Automatic Enhancements - Create, store, and edit collections of enhancements to apply simultaneously. -
* 
Image Filters - Options for Real-Time Filters
-
-
* 
Undo - Removes the last image enhancement applied. -
* 
Redo - Reapplies the last image enhancement undone. -
* 
Original - Removes all unsaved image enhancements.
-
- The Adjustment Bar* is available in the lower right of the Image Enhancement window. It may be minimized but will appear as pictured:
XVWeb
XVWeb provides ad-hoc image adjustments by left-clicking on a single image being viewed to select an image to enhance, whether within an individual image or layout. Once highlighted, a new row of options will populate at the bottom of the view window:
-

Transform - Options for physical adjustments of the image. 
Rotate - Spins the selected image one quarter turn clockwise. 
Flip Horizontally - Mirrors the selected image so the left becomes the right and vice versa. 
Flip Vertically - Mirrors the selected image so the top becomes the bottom and vice-versa. -

BCG - Options for adjusting the lighting of the image. 
Brightness - Increase or decrease the brightness of the image. 
Contrast - Increase or decrease the contrast of the image. 
Gamma - Increase or decrease the gamma of the image. -

Spot - Localized contrast enhancement.
(left-click to place the enhancement circle)
Size - Increase or decrease the size of the enhancement circle. 
Strength - Increase or decrease the intensity of the enhancement circle. -

Colorize - Locally applies rainbow effect to grayscale image.
(left-click to place the enhancement circle)
Size - Increase or decrease the size of the enhancement circle. -

Magnify - Localized magnification lens.
(left-click to place the enhancement circle)
Size - Increase or decrease the size of the enhancement circle. 
Strength - Increase or decrease the intensity of the enhancement circle. -

Enhance - Apply available Real-Time Filter(s) to the image.
-

Label - Add labels to the image.
(free-hand, lines, ellipses, rectangles, text, measurements, etcetera)
Permanent Image Quality Settings are generally dictated by the exposure values primarily, followed by any recommended settings from the sensor manufacturer. Below are the available recommendations:
Exposure Values
Patterson has provided the following chart of suggested exposure settings for popular x-ray heads: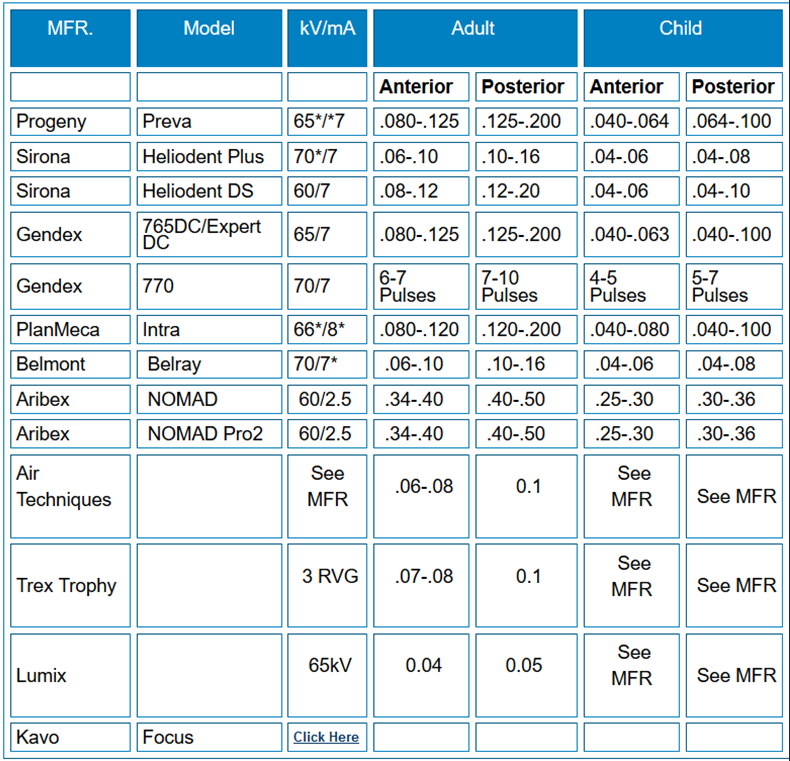
(source: General Guidelines for X-Ray Head Settings for Schick Sensors)
Sensor Hardware Specifics
Article Version 1.0 2021.02.22